Send Map to GPSr with Mapsource
1. Open Garmin MapSource application
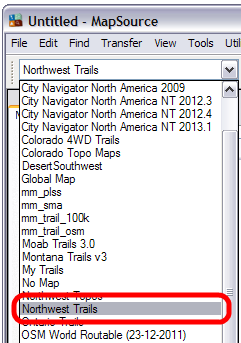
2. Select desired map from drop down menu
3. Allow MapSource to load map into memory
4. Enable Hand Tool

5. Use the mouse to center map in desired area
6. Use Magnification Toolbar to zoom in and out of map when necessary

7. Enable Map Segment Tool

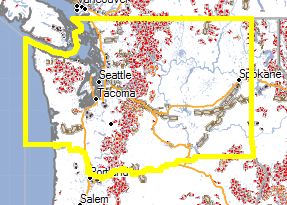
8. Position mouse over a disabled map segment
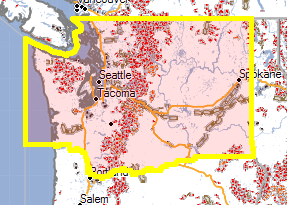
9. Left click the selected map segment to enable
10. Left click again to disable
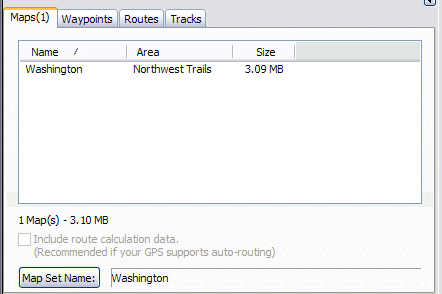
11. All enabled map segments, individual segment sizes, and total map size are displayed in the Maps Tab
12. Repeat steps 4 - 11, enabling all map segments from all maps you wish to send to your GPSr
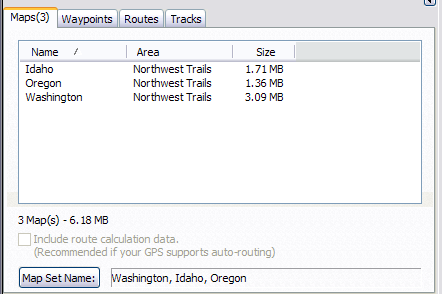
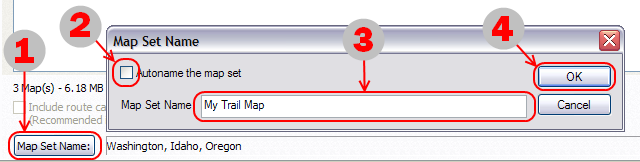
13. Rename map set (Optional)
- Select "Map Set Name"
- Deselect "Autoname the map set"
- Enter desired map set name
- Select "OK"
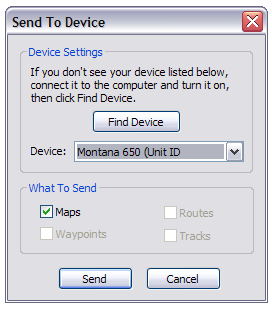
14. Connect your GPSr via USB and enable Mass Storage Mode
15. Select "Send to Device"

16. Choose a device to send the completed map to, ensure "Maps" is selected, and click "Send"
17. MapSource will build the enabled map set (may take minutes or hours, depending on total map size)
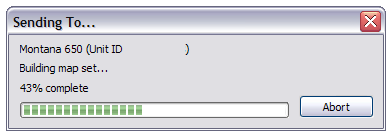
18. MapSource will then transfer the completed map set to the selected device (larger maps take more time)
-
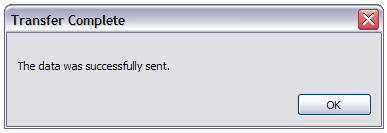
19. MapSource confirms a successful map transfer
20. Browse to Device:\Garmin\ directory
21. Locate gmapsupp.img file
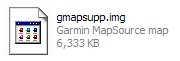
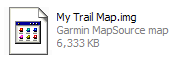
22. Rename file as desired, preserving .img extension
23. Save a copy of your new map for archival purposes, if desired.
24. Safely disconnect and reboot your Garmin GPSr
25. Enable your newly installed map(s) in the GPSr Map Setup menu.
Enjoy!